Coating of samples is required in the field of electron microscopy to enable or improve the imaging of samples. Compared to the traditional coater design, all parts of a Leica EM ACE Coater can be individually removed and cleaned or, if special cleanliness is needed, even exchanged for spare parts. For example, the large glass door is removable and has an easy to wipe flat surface. The internal shielding, shutter, stage and source are also easily removable and easy to clean or exchange. This step by step tutorial explains how to clean a Leica EM ACE Coater and how to remove internal components.
Cleaning process
Items needed:
- Latex Nitril gloves → IMPORTANT: Gloves could be contaminated at the outside with powder (talc) or dirt therefore wash them with soap and rinse with ethanol before usage!
- Ethanol or Isopropanol (close to 100 %)
- Acetone (close to 100 %)
- Non Scratching, Polishing, Cleaning Compound (e.g. Bell Jar Kleen) on a calcium carbonate basis or metal polish paste(e.g. Unipol, Starglanz, ...)
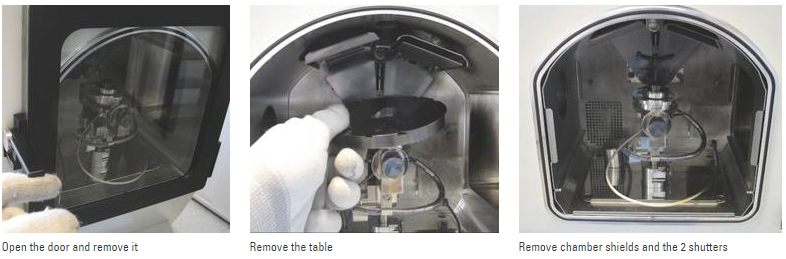
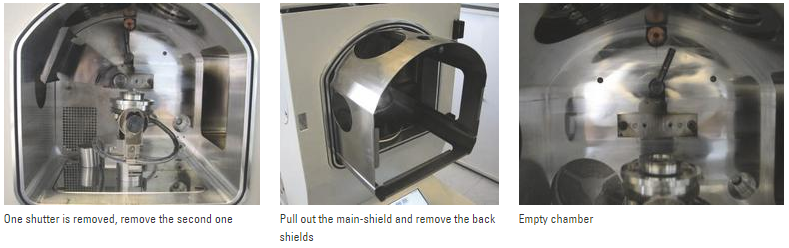
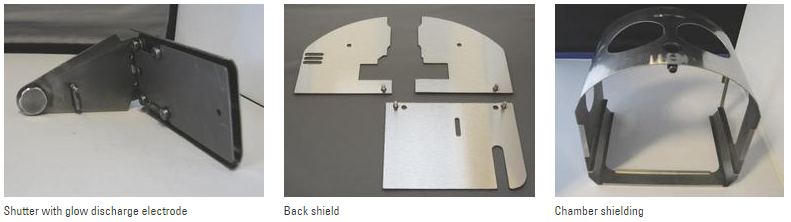
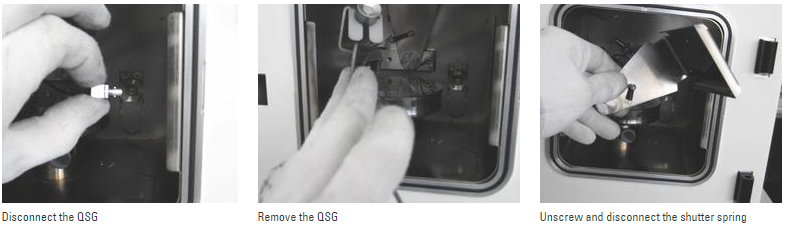
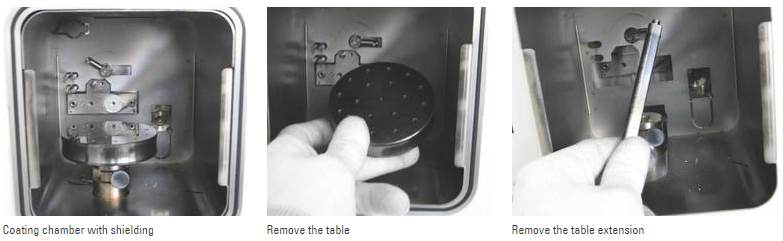
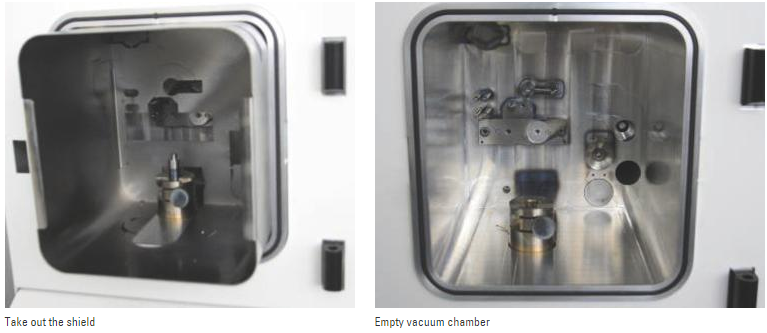
1. Remove internal shielding, shutters and stage out of the coating chamber – please also see sequence of pictures for details.
2. Clean these parts with the Non Scratching Polishing, Cleaning Compound (using water) or metal cleaning paste.
3. Rinse all parts with warm water to remove the remaining powder/paste.
4. Rinse parts with distilled water.
5. Remove distilled water from all cleaned surfaces – wipe with lint-free paper wetted with pure ethanol.
6. Wipe down surfaces with acetone and lint-free tissue.
ATTENTION: DO NOT TOUCH OR GO NEAR ANY ELECTRONIC PARTS!
Cleaning powder can cause oxidation and acetone could dissolve the cable insolation.
- Clean with the Non Scratching Polishing, Cleaning Compound (using water) or metal cleaning paste.
- Do not rinse with water – use a damp, lint-free tissue to remove cleaning compound or paste
- ATTENTION: DO NOT TOUCH OR GO NEAR ANY ELECTRONIC PARTS. Cleaning powder can cause oxidation and acetone could dissolve the cable insolation.
- After cleaning (as described above) switch on and pump the coater. Within 10 minutes 10–5 mbar should be reached. In case the pressure cannot be reached vent the coater and clean again with acetone. The surface of the tissue should not show any black coloration. ATTENTION: DO NOT TOUCH OR NO NEAR ANY ELECTRONIC PARTS.
- Vent coater and replace internal shielding, shutters and stage for the next coating run.
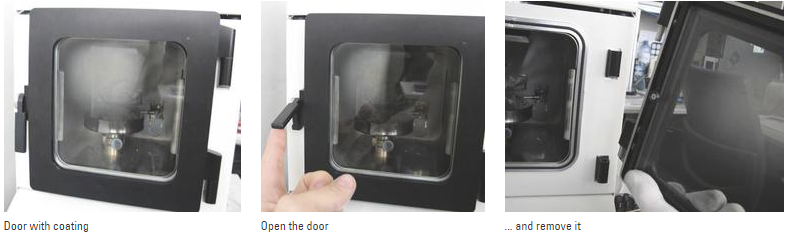
Usually, only the glass door needs to be cleaned, depending on the layer thickness, every 5 to 15 runs. The chamber shielding, especially when always using the same material, does not need to be cleaned regularly. When material starts to layer off the chamber it is recommended to take the shielding out and clean it.
Any abrasive works well for metal. Scotch-brite, metal cleaning paste, cleaning powder etc.

Do not use strong abrasives (like Scotch-brite) on the glass door as this can lead to scratches and vacuum leaks.
Washing the parts afterwards with soap and water followed by a distilled water rinse and letting them dry off is an easy way to remove the residues. Isopropanol or Ethanol can be used for the finish.